


Stamp Illustrator Tutorial

This tutorial will provide you a step by step procedure to create a stamp image with Illustrator .Stamp Images are useful for designing photo edge and album cover. In this tutorial we use 9+ version of Adobe Illustrator
1. create a box like the image below using the Rectangle Tool and transform the created rectangular path into zigzag by selecting Effect > Distort & Transform > Zigzag.
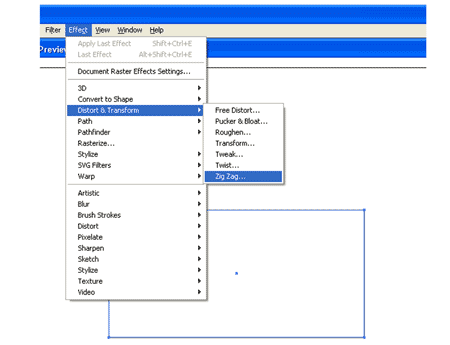
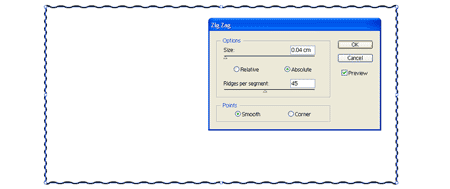
After opening the Zigzag window use the Preview to preview the result. The options for zigzag are Size=1, Ridges per segment=26.Press Ok.
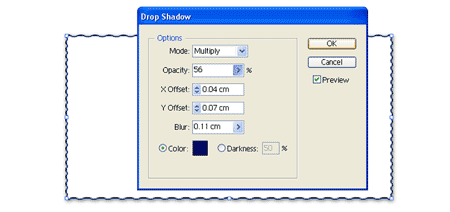
2. Select the zigzag path and go to Effect > Stylize > Drop Shadow for Adding Drop Shadow effect. The default settings for stamp are: Opacity=50, X Offset=1 Y Offset=2, Blur=3, colour= black.
3. Ultimately remove the stroke colour and place your artwork in it. Align them properly in the centre.
Note: For printing purposes change the Document Raster Effects Settings to 300 dpi to avoid pixelated print output. Document Raster Effects Settings can be changed by selecting Effect > Document Raster Effects Settings. For web applications set it to 72 dpi.


Stuff
- » Home
- » About us
- » Portfolios
- » Illustrator
- » Tutorials
- » Testimonials
- » Contact
- » T&C
- » Sitemap